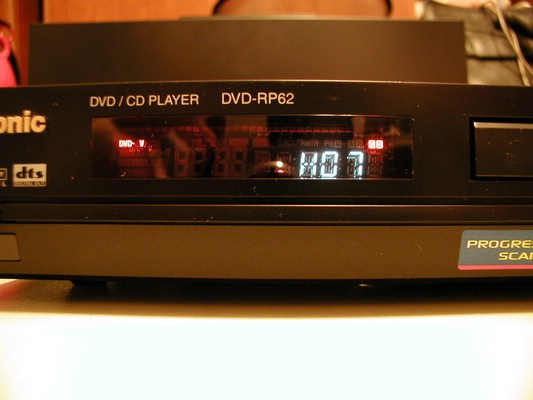
How to fix the H07 (HO7) Error on your Panasonic DVD player
Updates
- 08/06/2008 When I first posted this guide I never expected to received the amount of feedback I have been getting. I would like to thank everyone for their kind words. I have moved the guide into this wiki to make things easier.
- 04/08/2004
I found a replacement part from Panasonic but I don't know if it will work. Several places state that this is a replacement motor for Panasonic DVD players.
Prices range from $30 - $60 for the motor.
Panasonic DVD Model: SAHT70 part number: RXQ0749A original is RXQ0749
Panasonic DVD Model: DVDRP62 part number: RXQ0745B original is RXQ0742B
If you have another player please email me and I will see if I can look it up. Also if you have your player open and you can see the number on the motor please let me know as well.
You can by the parts here:
http://www.pasc.panasonic.com/epartr/ http://www.partsolver.com
Lubricating the Motor
WARNING: This can be dangerous. Please follow safety guidelines.
I take no responsibility for your actions.
I've seen tons of posts about this problem so I decided to write a quick guide to fixing the problem. This fix my not solve the problem permanently but seems to work for at least a while. Best solution would probably be to replace the motor itself with a better one. I will try to located a good replacement when I have some free time.
All you need is a philips head screw driver and some oil. I used WD-40 but as some of you have pointed out it isn't a long lasting lubricant and should not be used. Sewing machine oil is a better solution. You should also not use a spray oil as you can damage the optics if you aren't careful.
First disconnect the unit from power so you don't kill yourself.
Next open the dvd player by removing the 7 screws (2 on each side and 3 on the back on my model). Gently pull of the housing.
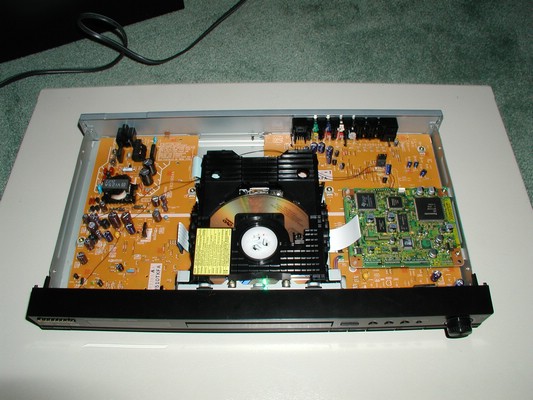
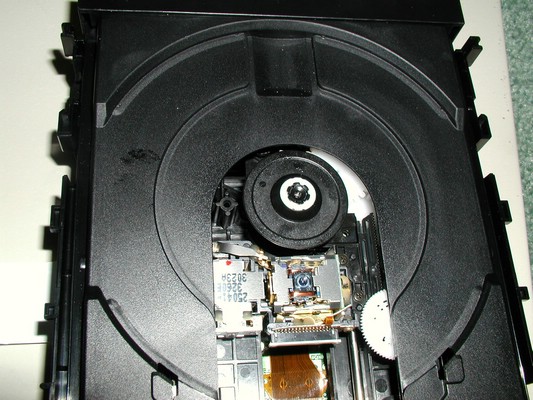
You should see something like this now (you should remove the CD/DVD before you open your machine, I forgot):
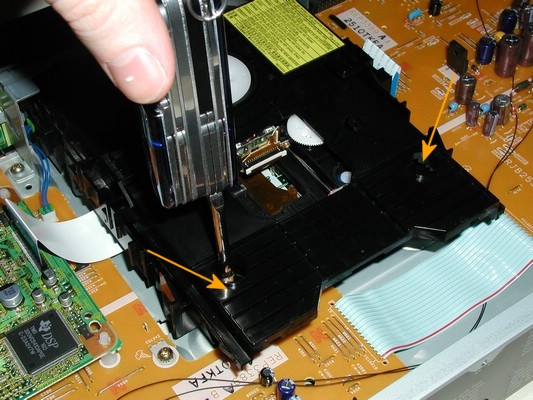
Remove the two screws holding the assembly located here:
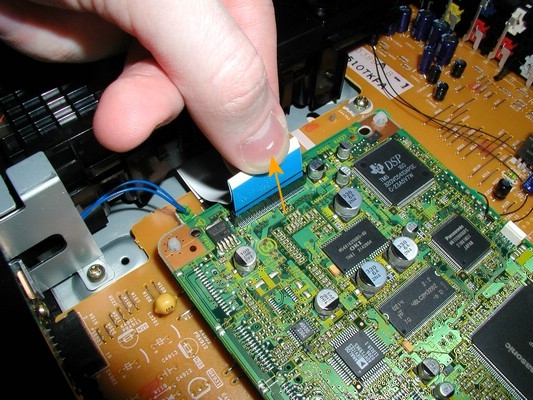
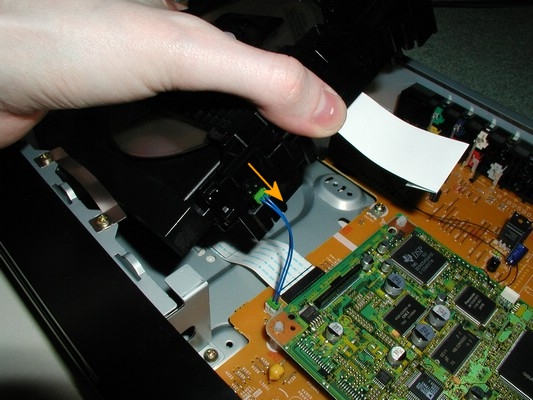
Now, very carefully remove the ribbon cable. Don't put too much stress on it!
Pull out the assembly slowly and remove the other connector. Do not pull on the wire. Use your finger nails to wiggle the connector out of the socket.
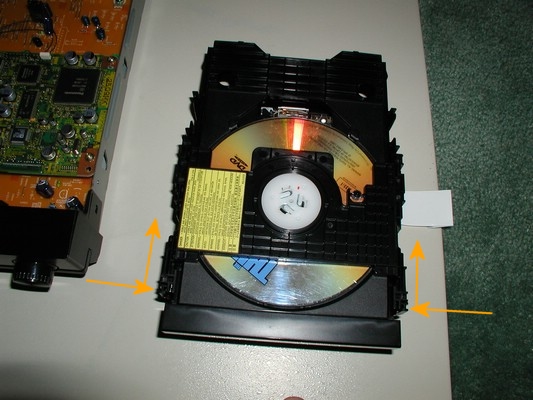
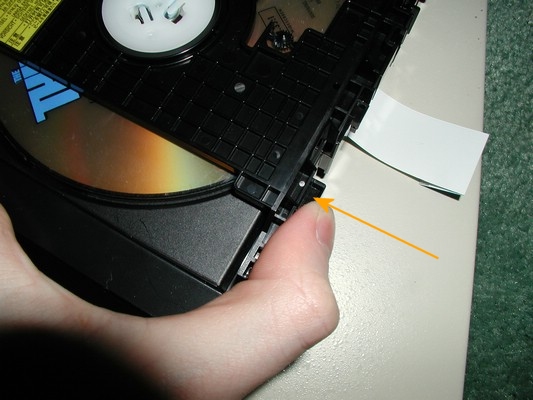
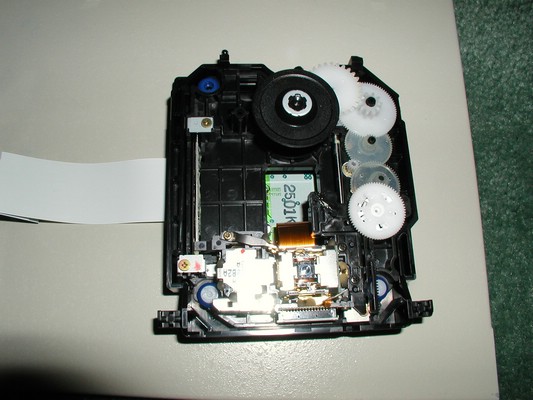
Now remove the laser protective cover by pressing in the clips and then sliding it off
If you can see the motor at this point you don't need to remove the inner part.
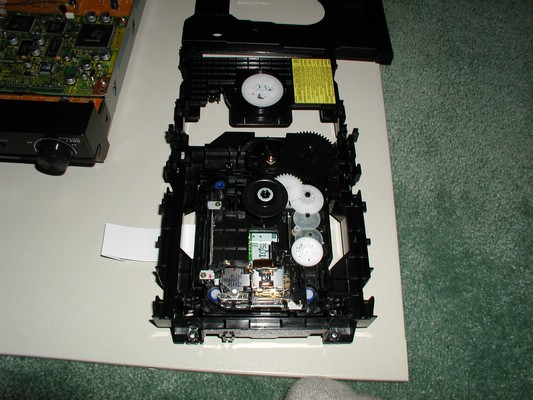
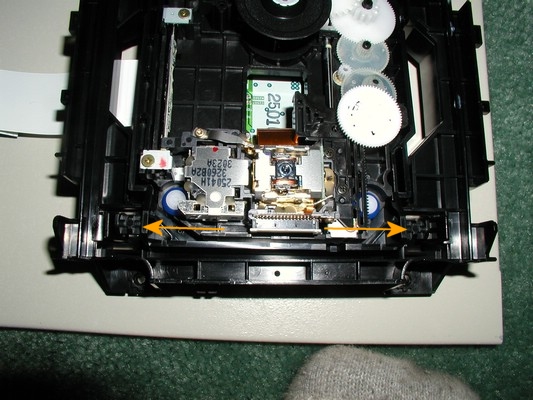
Otherwise remove the inner section by pressing out the clips and lifting it out.
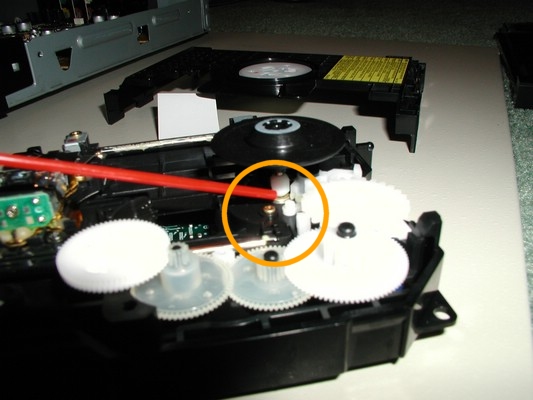
Now lubricate the motor. Use only very little oil and spray away from the laser!
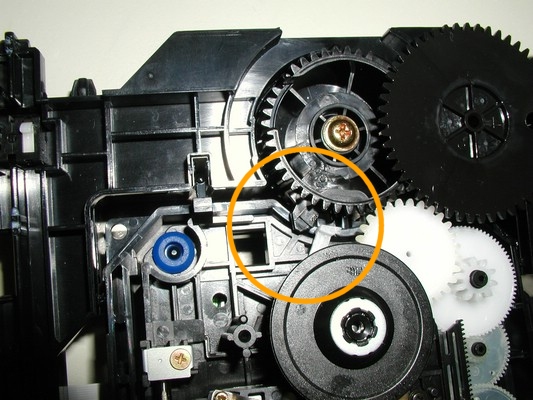
Reassemble the inner section by setting the gear in the position shown below.
Replace the tray like so.
Reassemble and your done.
